K2 Delay Server
Eagle Brook uses a time-slip media server for live and delayed playback of the broadcast message from our Broadcast Campus. The K2 Solo, often referred to as the Delay Server or the K2 lives inside one of the engineering racks in your control or engineering room.
Why we use this
This time-slip device is important for our campuses for several reasons. While we have the technology to watch the stream from the Broadcast site in real time, the campuses need the flexibility to begin the message on their own time for a multitude of reasons. The delay server is also our main backup for message delivery at campuses in the event that a live message is not being broadcast from the Broadcast location.
The basics
The delay server has two destinations, DLY 1A and DLY1B. These are both record and playout channels. The RCP at your campus will allow you to route whatever source you wish to the delay channels; however, the Setup salvo will automatically route the correct sources to the appropriate channels. DLY1A should always have RX1 routed, and DLY1B should always have RX2 routed. These correspond with the side screen cut and the static shot that you most commonly see at campuses. For campuses with only one display, while you still have both DLY1A and DLY1B, you will only display DLY1A for playback during services. While there are two record and playback channels, both channels are combined into one clip to allow for seamless playback without sync issues between the side screen cut and static shot.
Technical operation
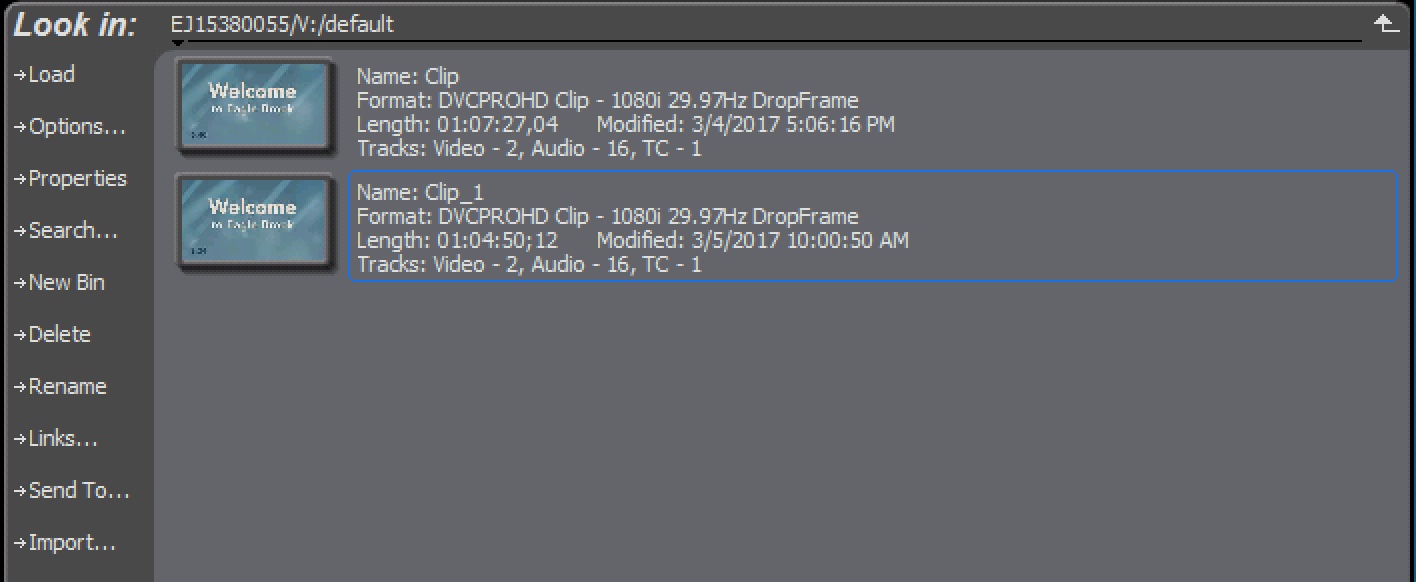
The delay sever can be accessed by selecting the K2 Solo from the KVM user station of your choice. The application has three main sections with which you’ll interact. The left two sections are the record and playout channels. The right and largest section is the clip storage section. Upon recording, a new clip will populate in the right section, allowing you to interact with the clip, change the name, delete the clip, or move it into the playback channel. Once a clip is recording and in the playback channel, you can fast-forward the clip to ‘LIVE’, pause the playback while leaving the clip loaded, or cue to a timecode.
In-service operation
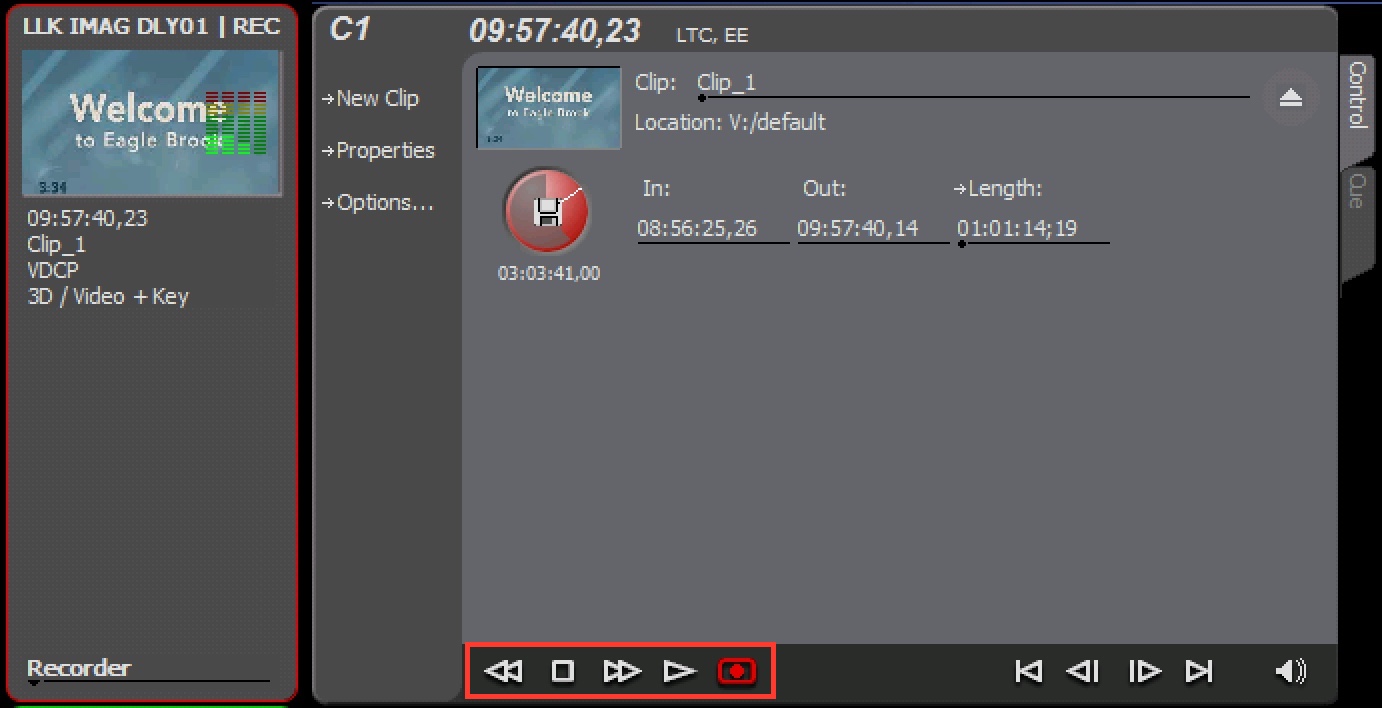
Begin recording on the delay server ten minutes before the hour (4, 9, 11) for every live service coming from the Broadcast location. In the top left, you’ll have C1 (the recorder channel). Click the record button, then find the new clip in the right clip storage section.
- Rename the new clip by right-clicking and selecting ‘Rename,’ then rename the clip with the time of the service being recorded (4 p, 9 a, 11 a).
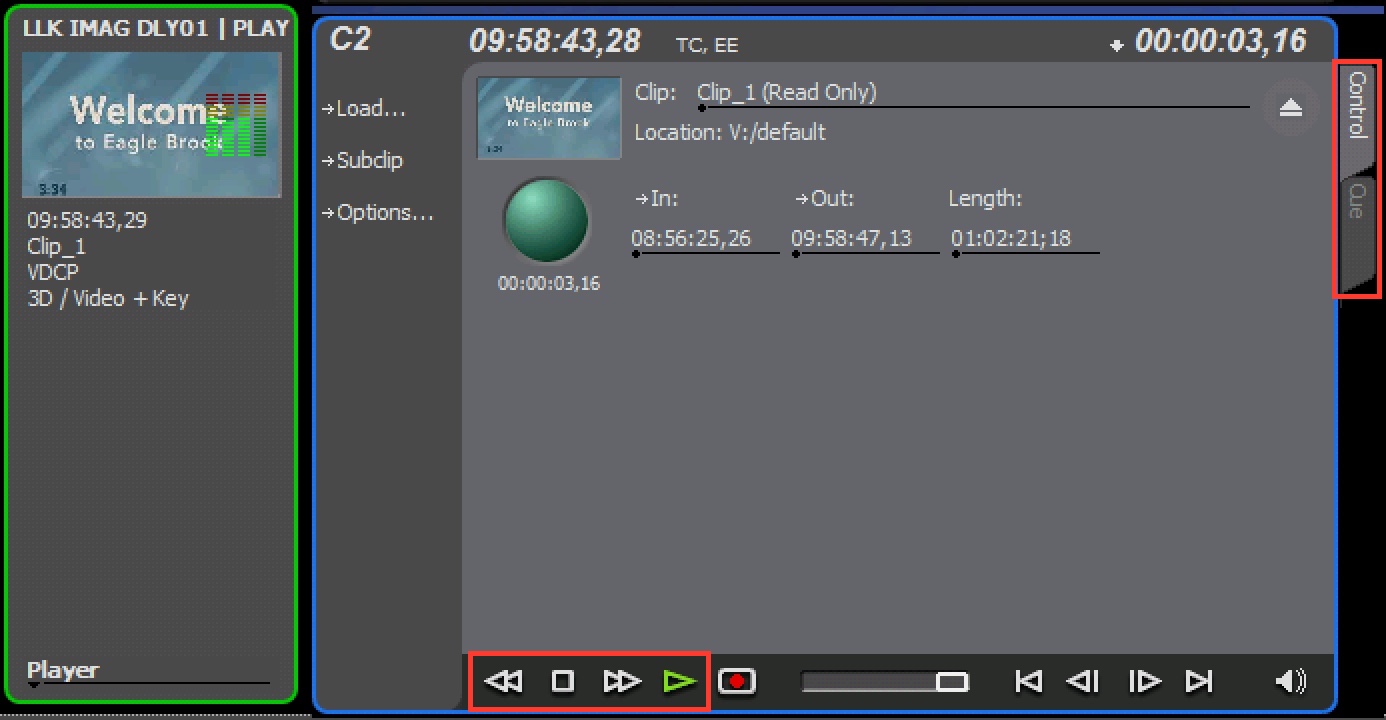
- Drag the clip into the playback channel, then select the fast-forward button to watch the delay live with the Broadcast location.
- As the Title Package and Message draw near, a list of timecodes will be sent from the Broadcast location producer via Slack in the #002-weekend-execution channel. As soon as you’ve received the TP timecode, stop playback in the C2 playback channel (not the record channel), then navigate to the ‘Cue’ tab.
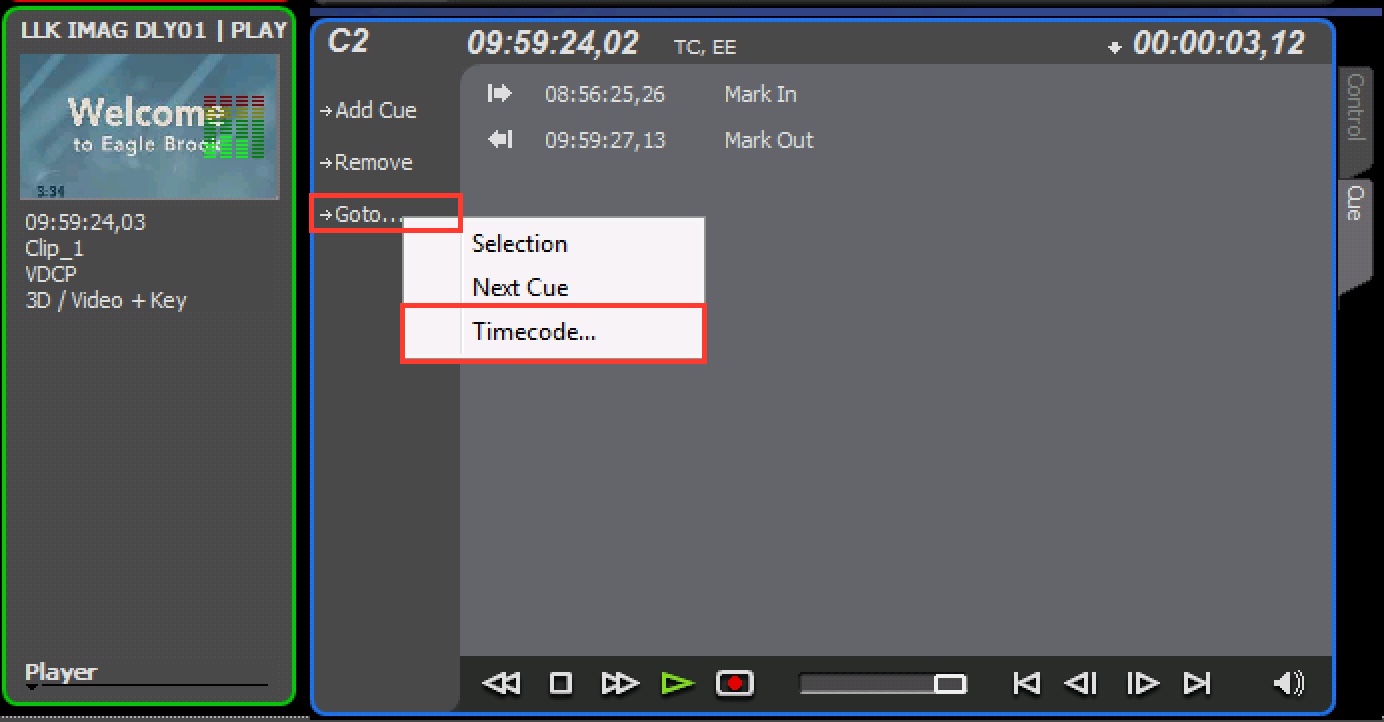
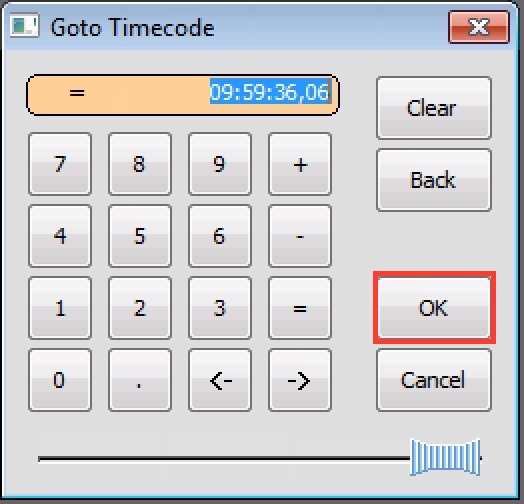
- Select ‘Go to...” then “Timecode” and enter the TP timecode from Slack. Then, add a cue so you do not have to reenter this timecode if something goes wrong. Once you confirm that the playback channel has been cued to the correct TP timecode and the frame is black, alert the Video Director, CPM, or Switcher (depending on location) that the message is cued via com.
- The message will roll when the switcher uses their MSG custom, however, if the message does not roll you’ll simply press play on the playback channel.
- If you keep the delay server up on your KVM or remote session during playback, be sure not to stop the recording or playback.
- After the message has concluded and your local service is over, stop the recording channel and eject the clip. Do the same for the playback channel, or load the clip needed for the next service’s message.
Recording on the Delay Sever
Begin recording at the beginning of every service. To record, find the “Recorder” section of the AppCenter software on the delay server display, found at the top left quadrant. Simply click the red record button at the bottom of this section to begin recording. The new clip will appear in the file browser section, on the right side.
In the “Player” section of AppCenter, in the bottom left quadrant, ensure no other clip is loaded. If another clip is displayed in the player, click the eject icon, found on the “Control” tab of the player. Drag the new clip from the file browser section to the player section, and click the fast forward button on the bottom of that section, indicated by two forward facing arrows.
Cueing on the Delay Server
Once a clip is recording, it can be cued in the “Player” tab at any time for message playback. Click the “Stop” button on the bottom of the player section. Click the “Cue” tab on the right side of the player, then “Goto” then “Timecode”. In the window that opens, type the desired time. To cue properly, you must type all 4 fields (hours, minutes, seconds, and frames). For example, 16:22:15:00. Click “OK”. The clip is now cued to the timecode entered.
Deleting Clips on the Delay Server
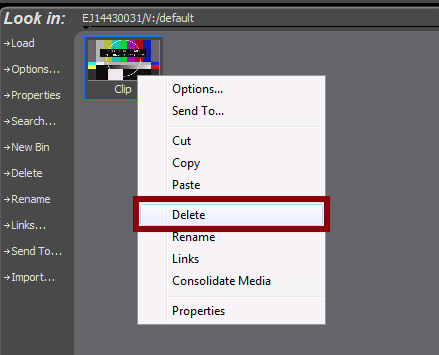
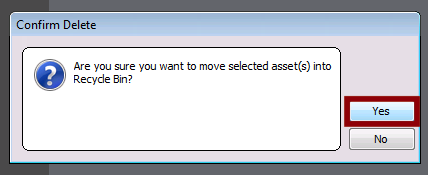
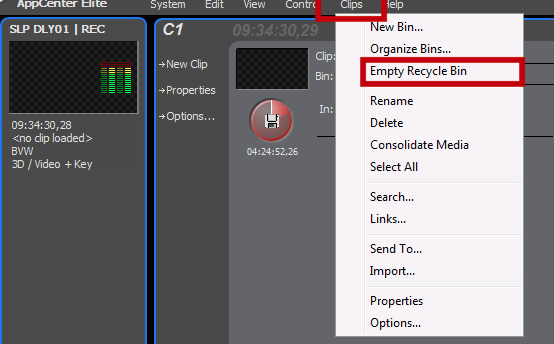
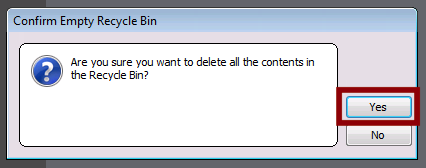
Once services are over for the weekend or you no longer need the clips on your server, select the clips you want to delete, right click, then select 'Delete.' Once you've deleted the necessary clips, select the 'Clips' menu, then find 'Empty Recycle Bin' and click 'Yes.' This will clear your delay server and you'll be able to record new clips.
