PIVOTCam User Guide
As Eagle Brook adds variations in campus technology, Single Screen Campuses are now equipped with robotic PTZ (pan, tilt, zoom) cameras for lobby reference and archival purposes.
This guide will give you the basic steps to operation of these cameras.
Basics
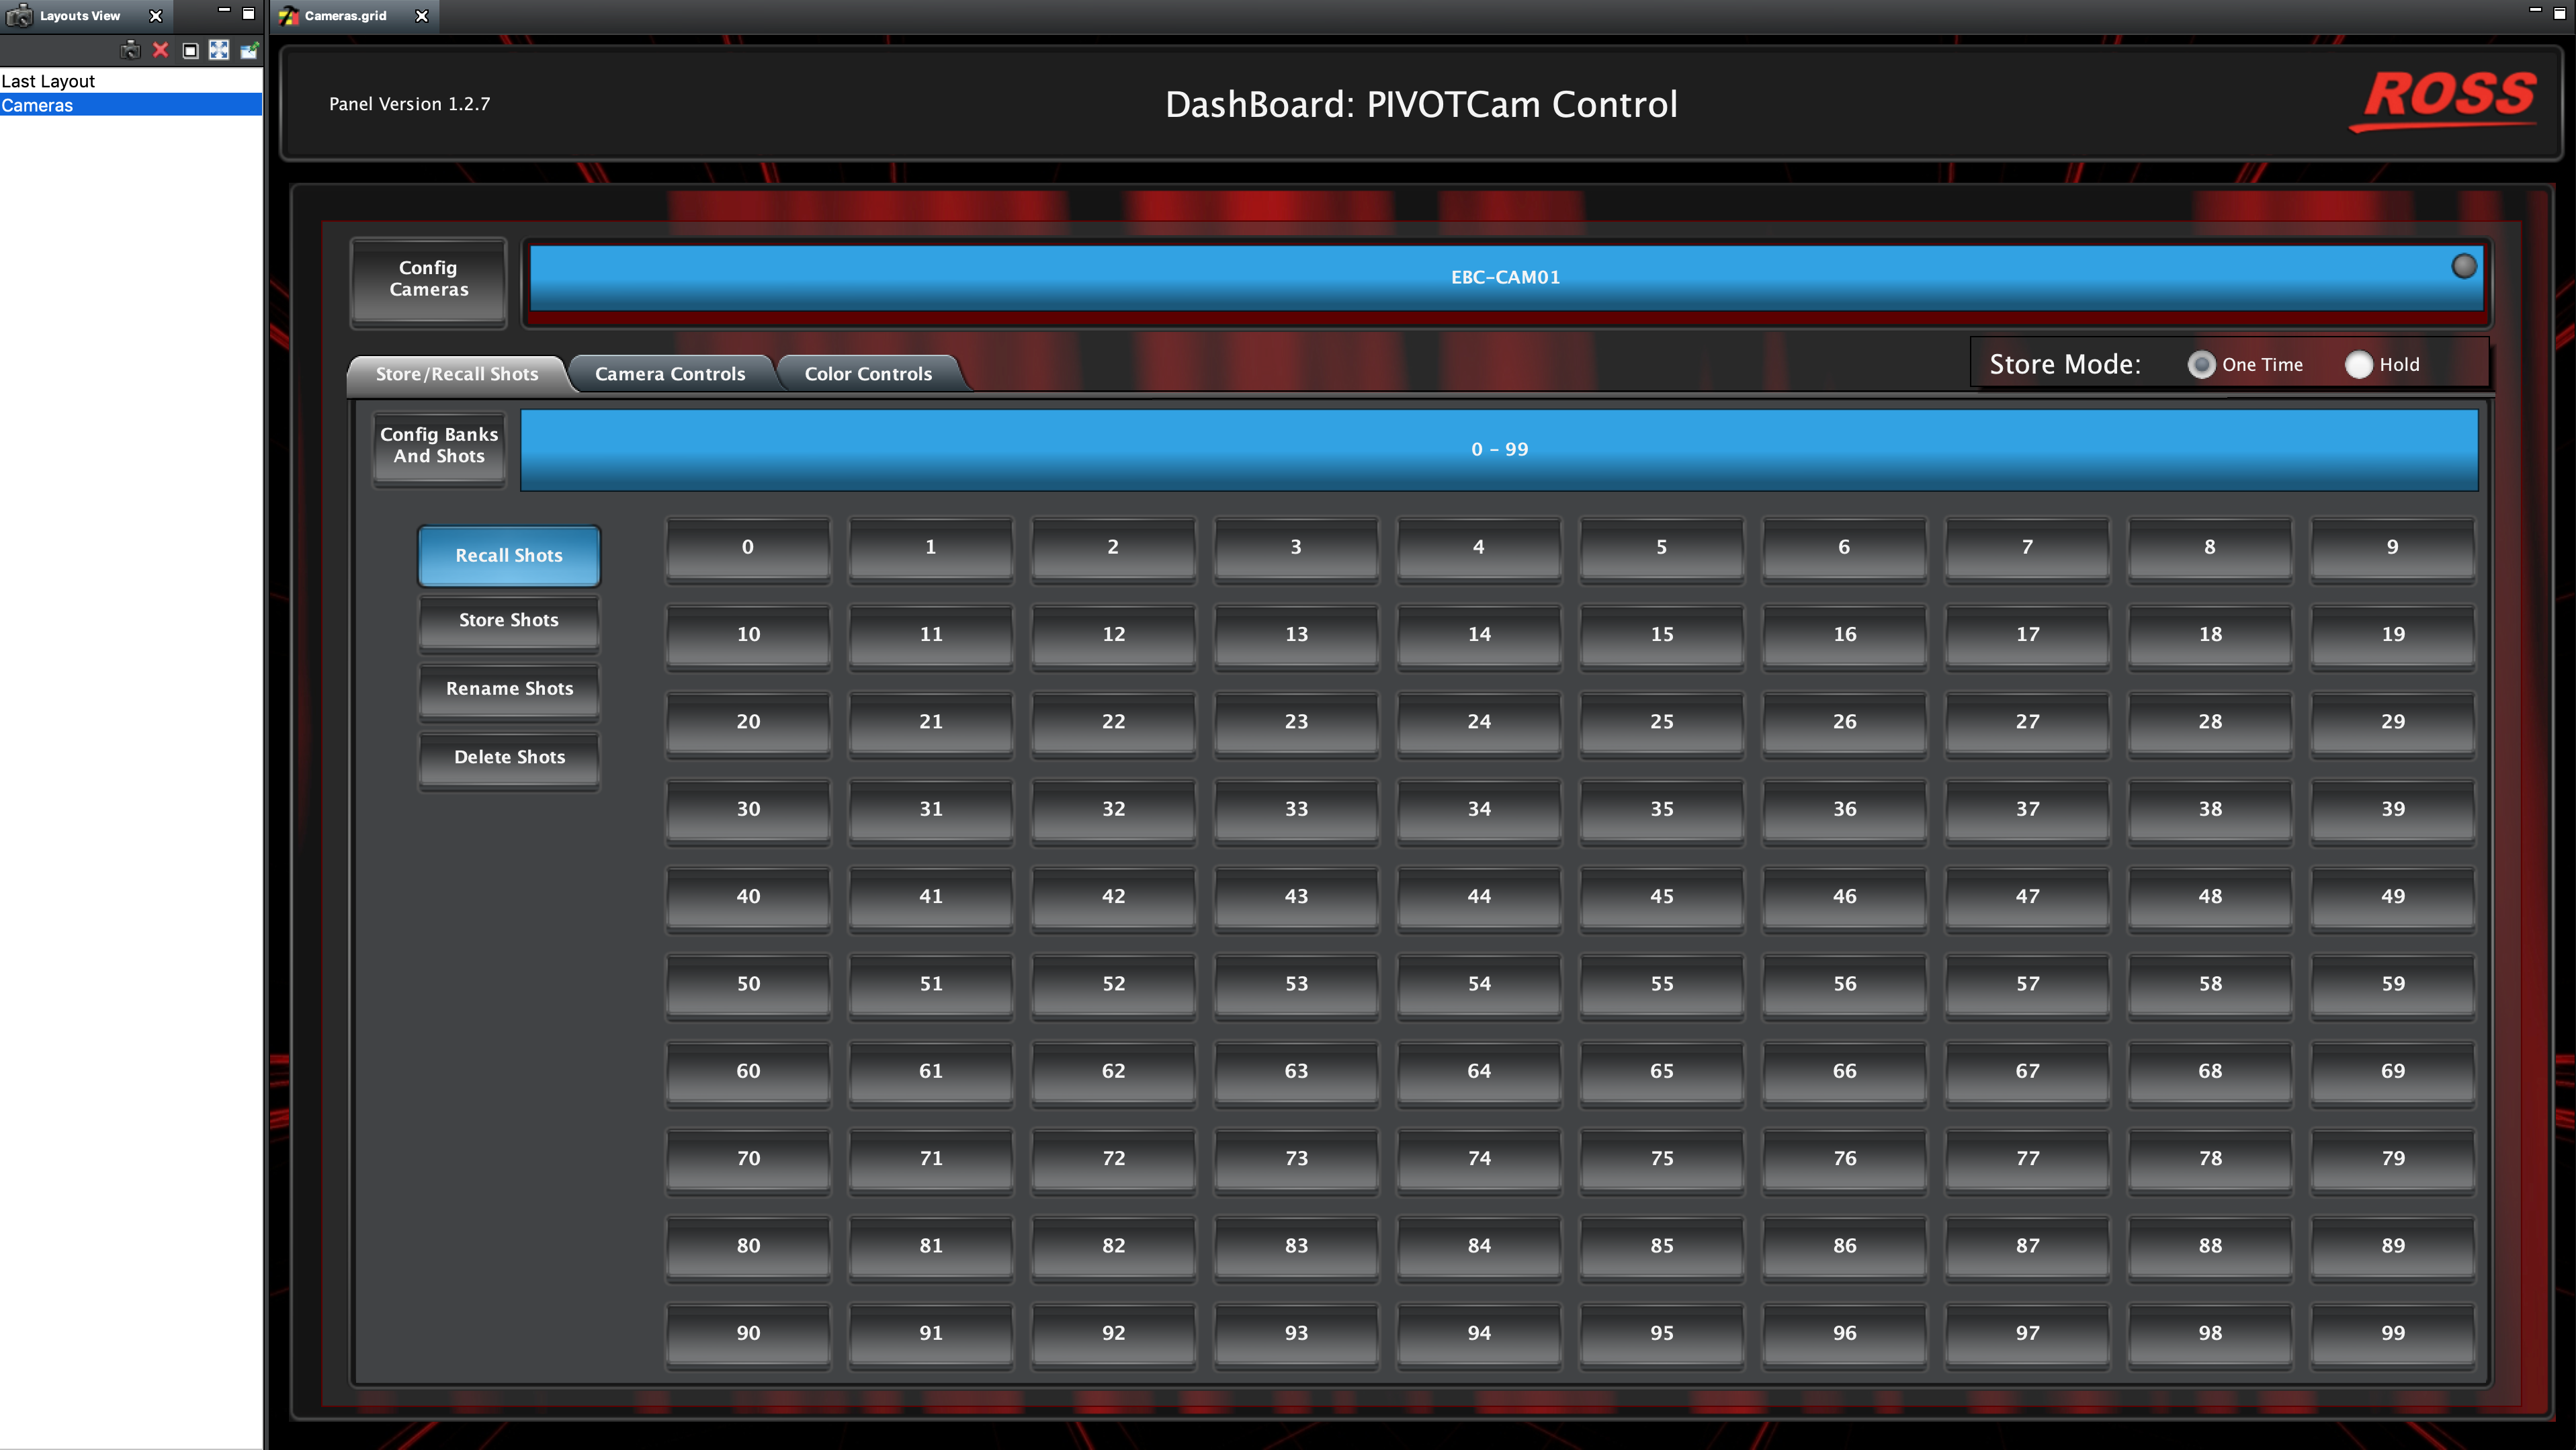
The PTZ cameras are controlled via a software application called Dashboard, which is available on one or more of the PCs available at your location. To open the camera control in Dashboard, double click the “Cameras” option in the layout menu on the left of Dashboard’s main screen.
Each location either has one or two cameras available for use. If there is more than one camera available, there will be two tabs next to the “Config Cameras” button. The cameras are named with the campus code, then the camera number (ex. WBL-CAM01, etc.).
When the cameras are connected there will be a green indicator light in the corner of the tab with the camera name. If the indicator is gray, the camera is not connected.

There are two main tabs that you will use when operating cameras on the weekend. The “Camera Controls” tab is where you’ll be able to manipulate the camera to find specific shots, and the “Store/Recall Shots” tab is where you’ll do just that, store and recall shots.
The “Color Controls” and “Camera Config” options should not be accessed at any time for any reason. Production Systems and Support Staff should be contacted for any changes or questions regarding these options by either submitting a helpdesk ticket or sending an email to production@eaglebrookchurch.com.
Camera Controls

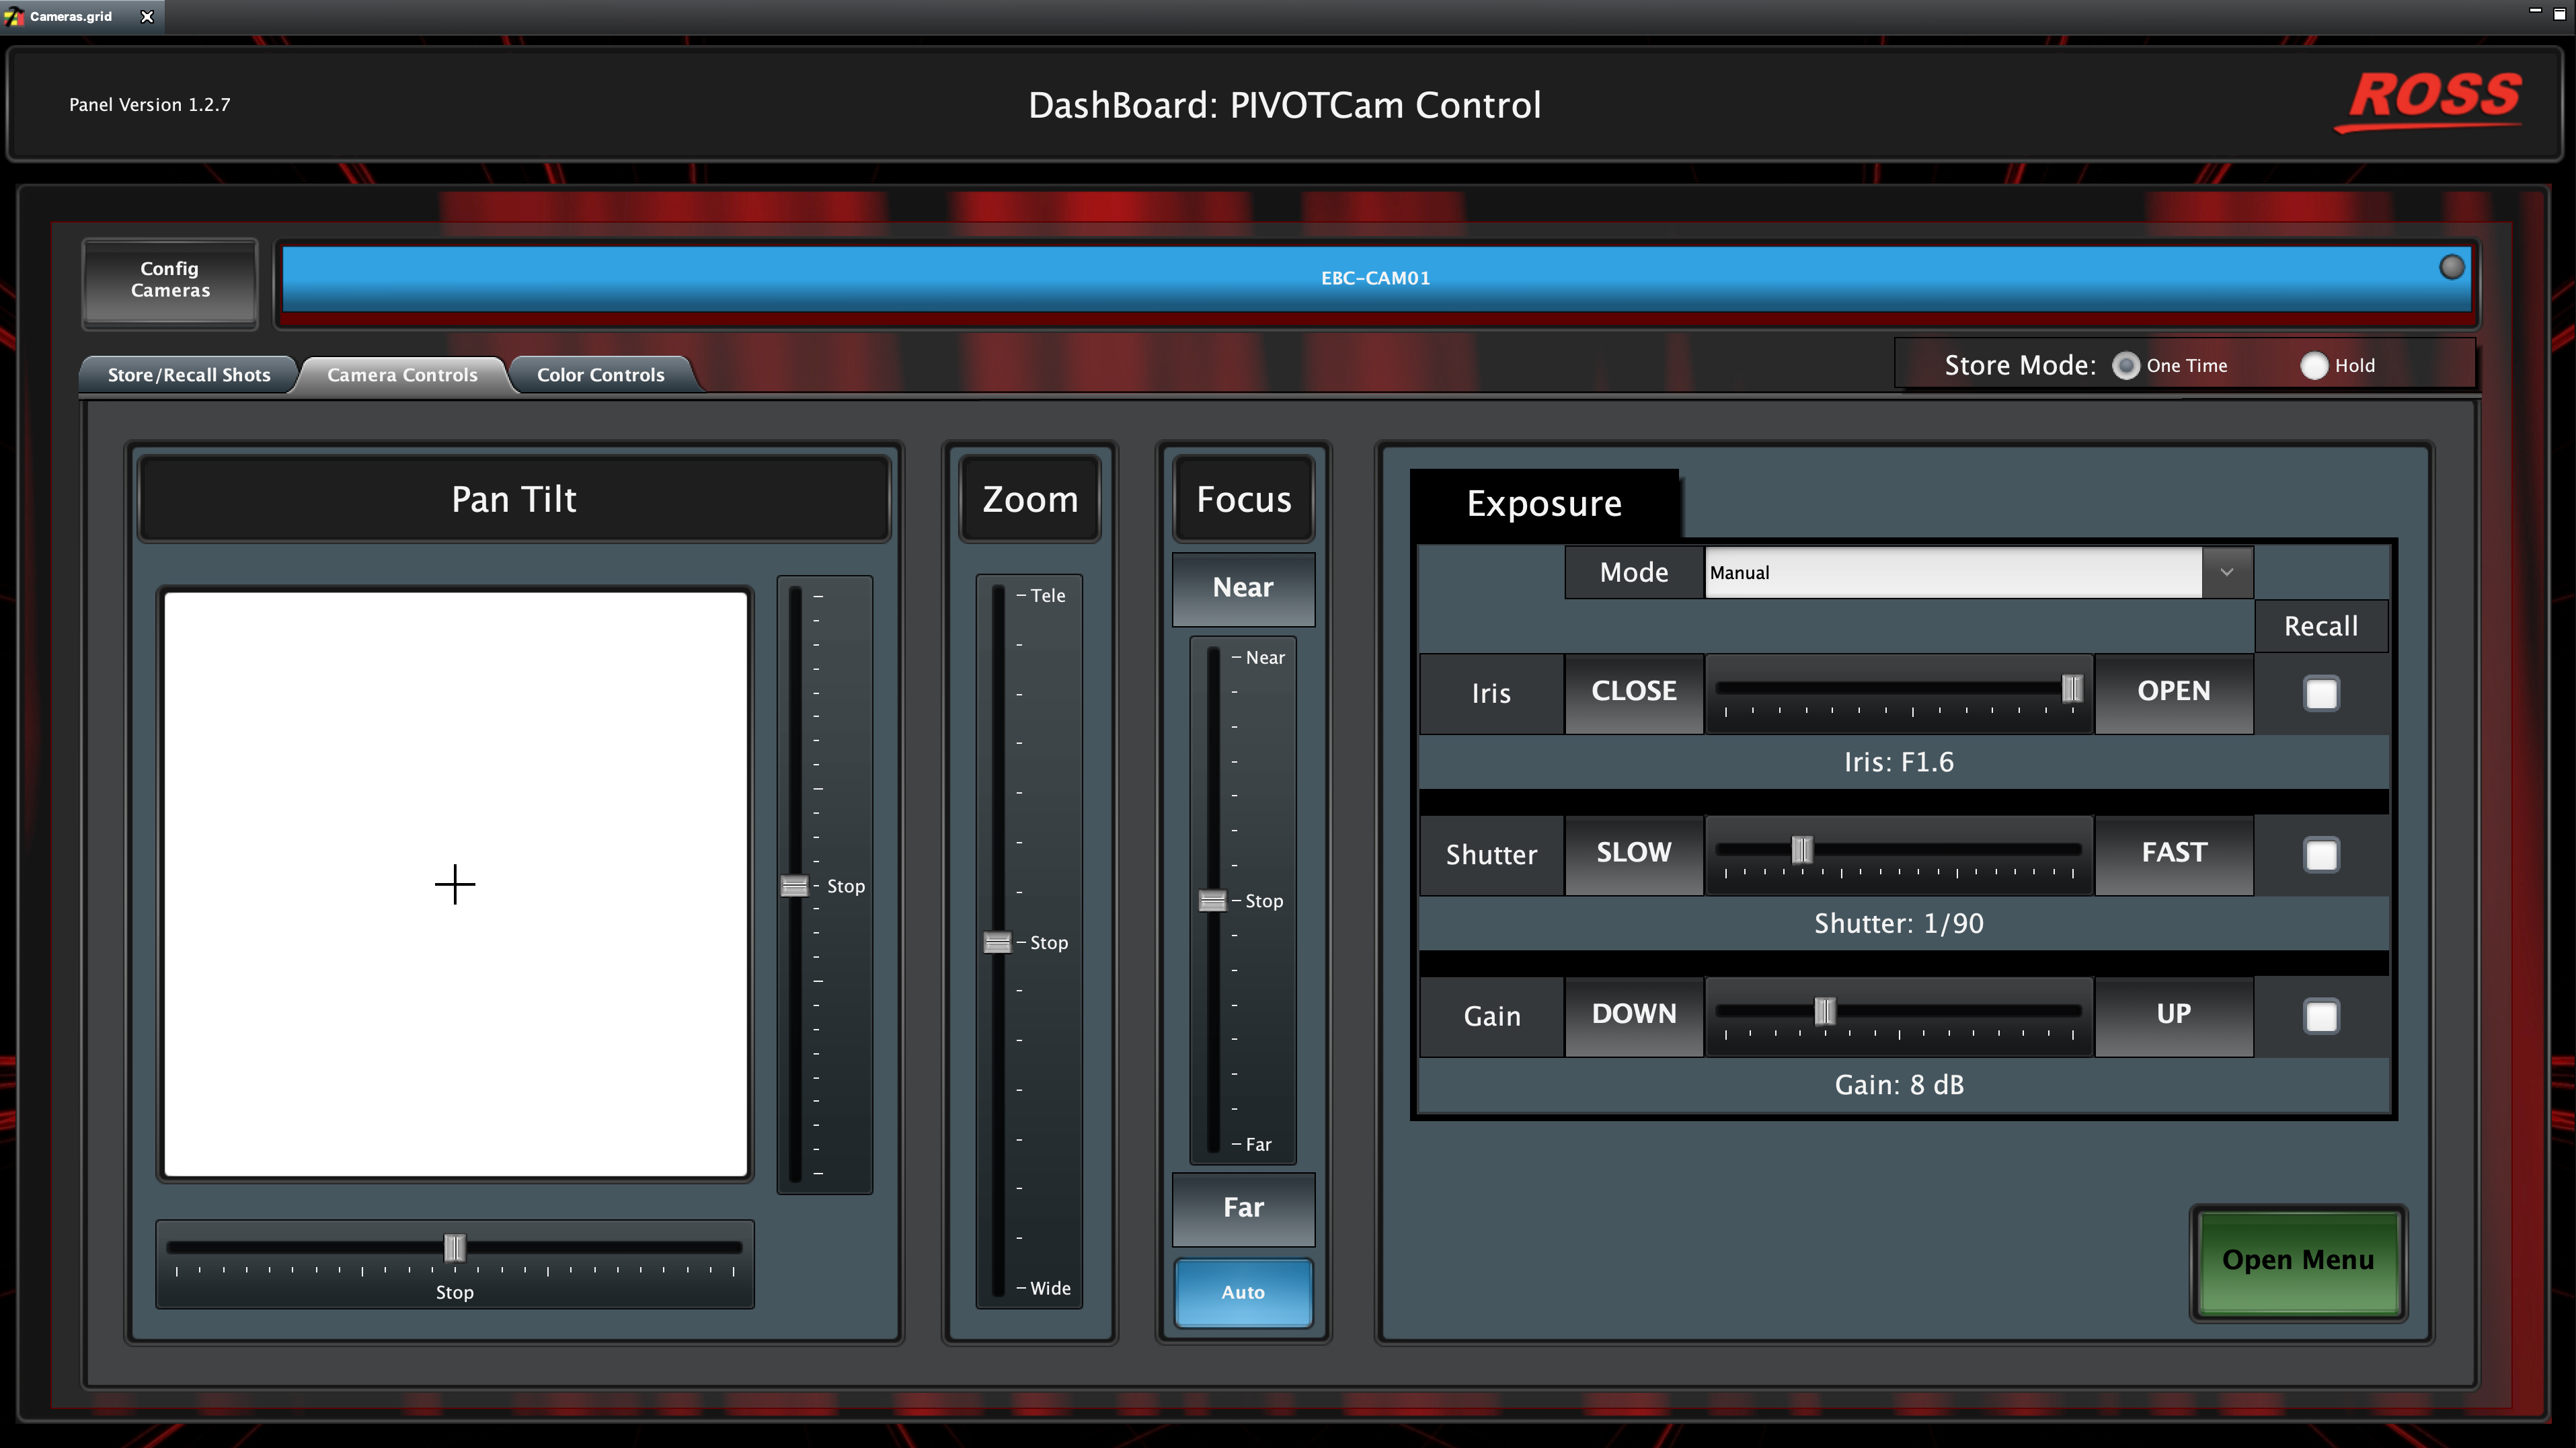
The “Pan Tilt” section allows you to adjust the cameras aim position with the adjustment sliders or the crosshairs in the white box. The controls are true to the direction the camera is facing, so sliding up or moving the crosshairs up will move the camera head up.
The “Zoom” section operates the same way the pan/tilt controls, just in adjusting the focus. This section includes labels for “Tele” and “Wide” which allows you to get a tighter shot or a wider shot.
The “Focus” section operates the same way as the previous controls, however it also includes an option for auto focusing and for minor adjustments. The buttons on the top and bottom of this section “Near” and “Far” will allow you to make fine adjustments to the focus while the adjustment sliders make larger changes at a faster pace.
The “Exposure” section gives you control over the Iris, Shutter, and Gain adjustments for the camera. This section should always be on the “Manual” drop down, so you are able to adjust when setting shots. When in manual mode, all exposure settings will be saved in the shots saved.
Store/Recall Shots

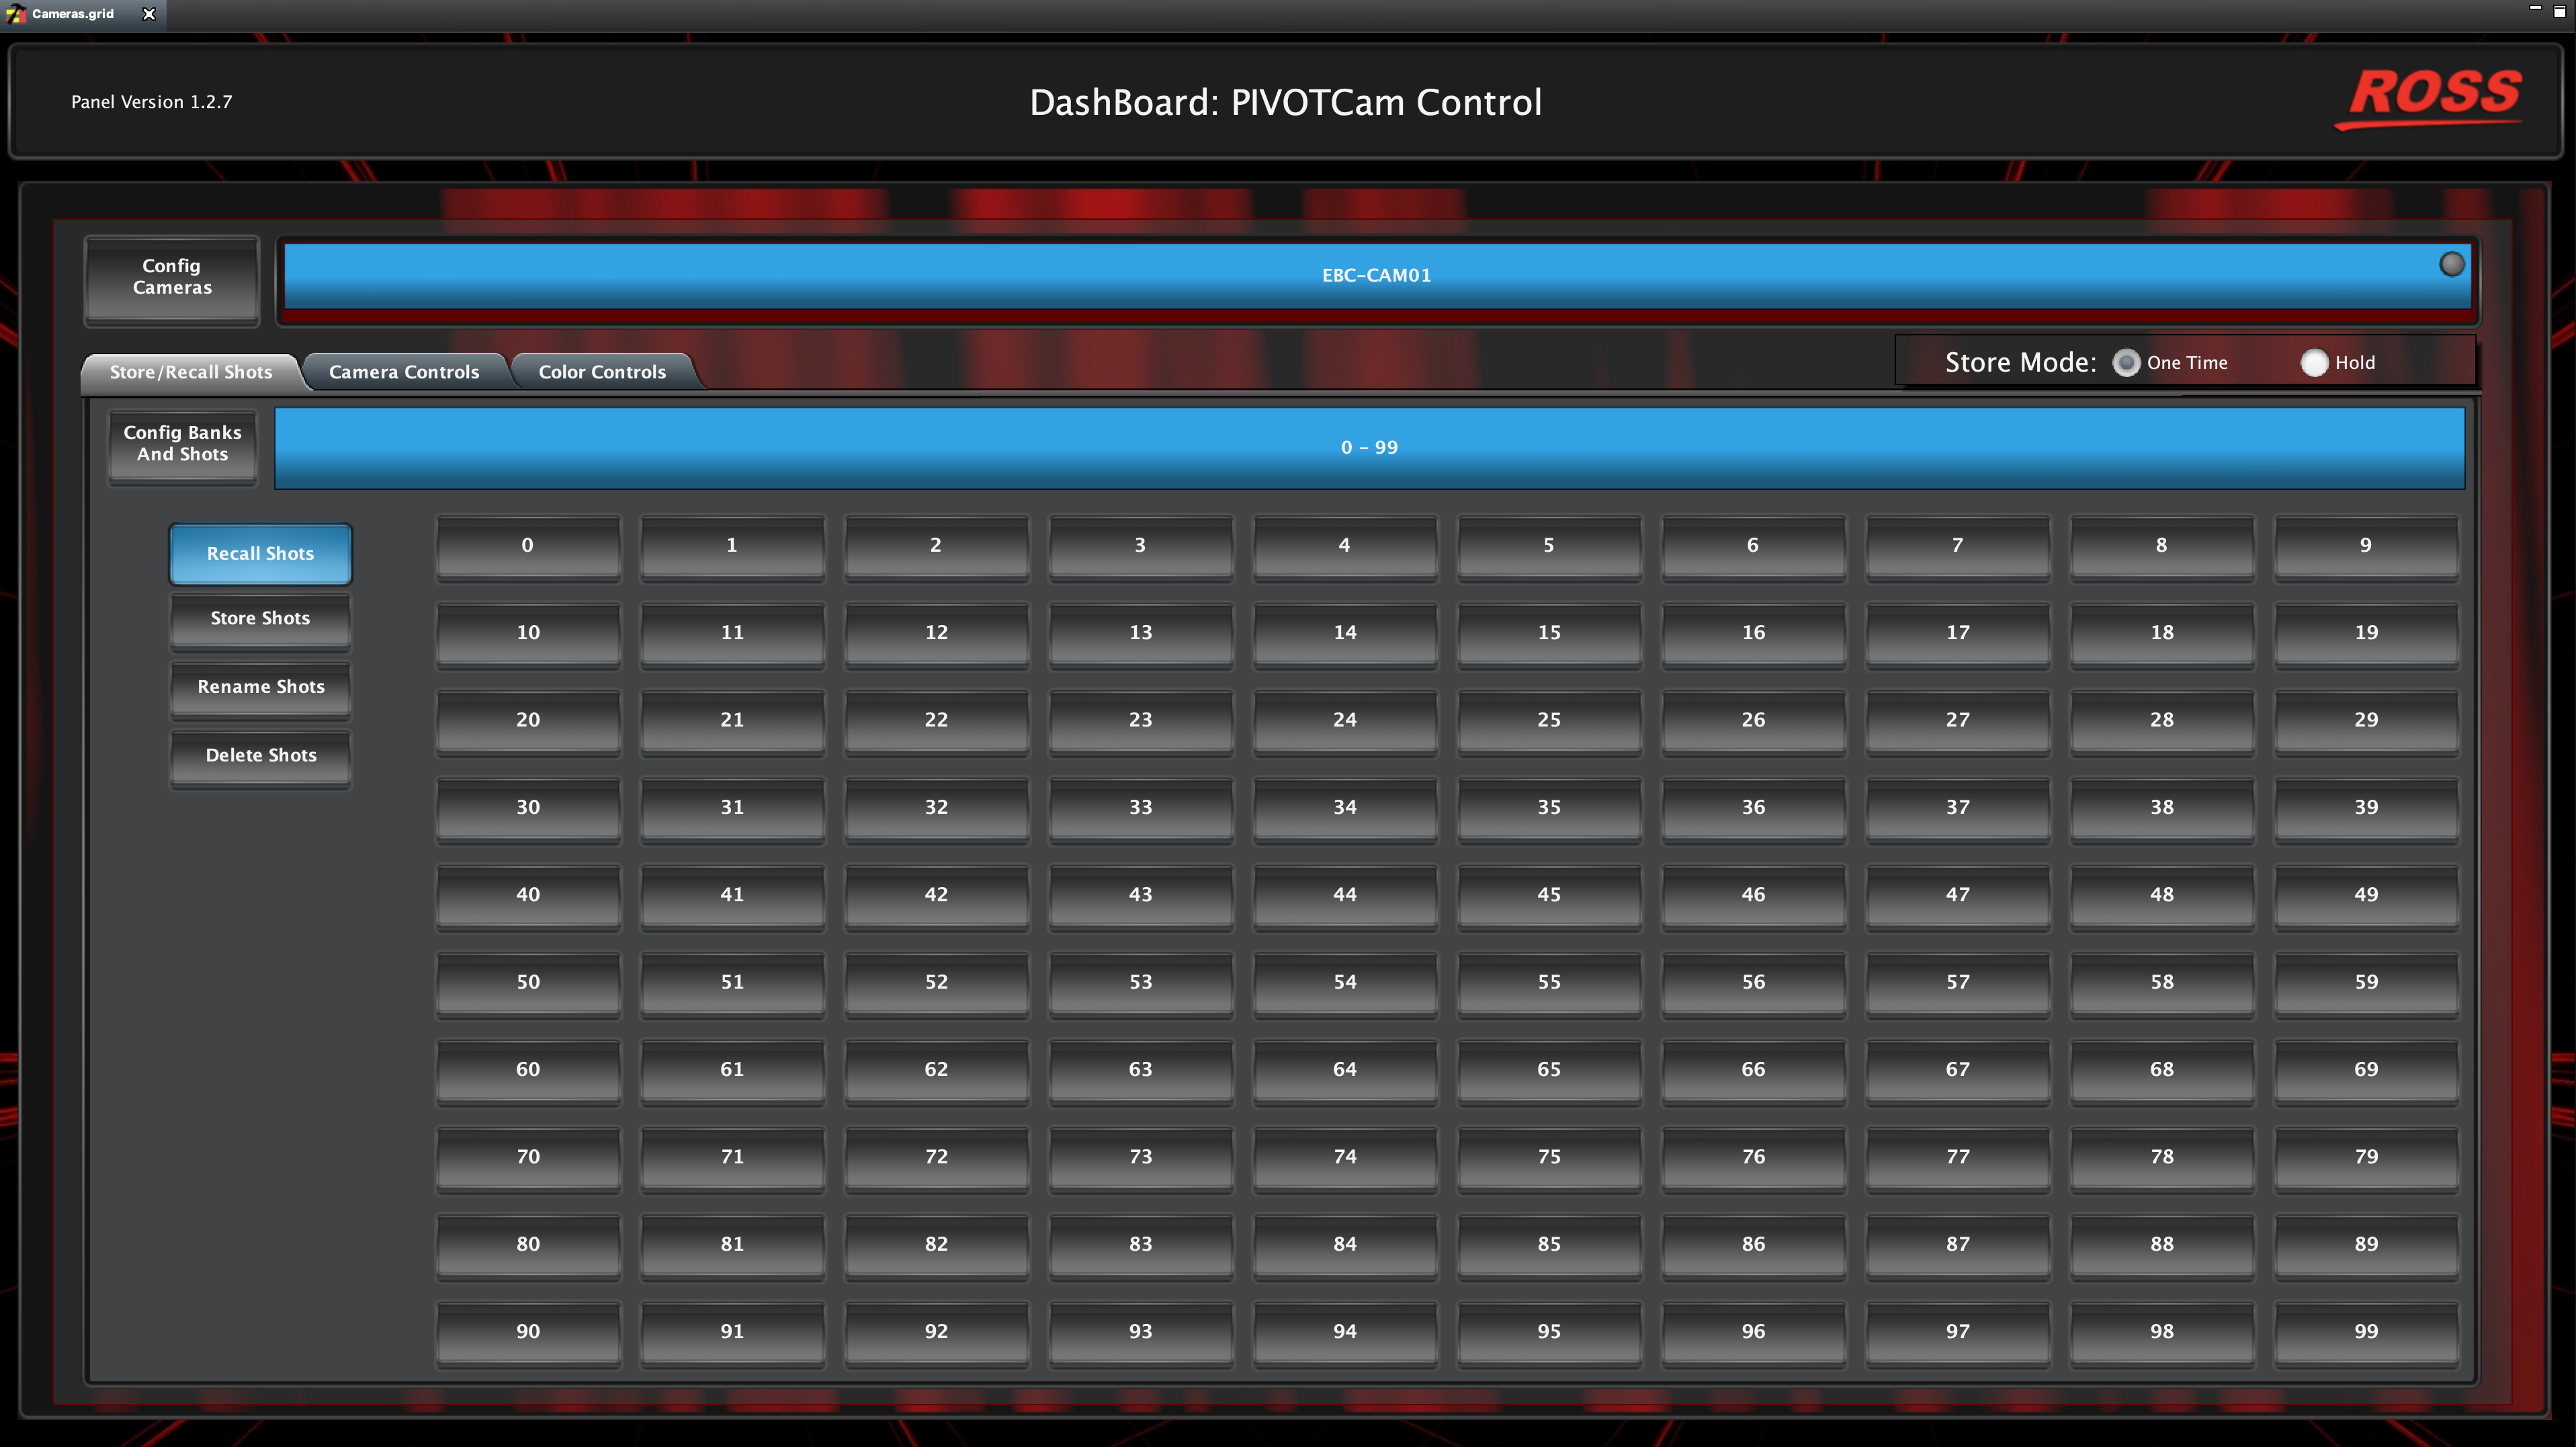
Controls on the Store/Recall Shots tab enable you to store, recall, rename, and delete shots.
Once you’ve set the shot you want in the camera controls tab, select the “Store Shots” button and then select one of the number buttons where you want to save the shot.
You can also rename the shot, so they are not just numbers. Select the “Rename Shots” button, then the shot that you want to rename.
If you stored a shot that you no longer need or want to restore it, you can either store a new shot over the previous one or you can use the “Delete Shots” button to remove unneeded shots.
To recall shots during a service, select the “Recall Shots” button, then choose the shots you want to recall when ready. As a general rule of thumb, we do not recall shots while the camera is live, only when the camera is in preview or not being used. The recall does not act like a manned camera, so it’s not pretty to look at.
Questions
If you have any questions on operating the PIVOTCam at your campus, reach out your local production staff, or contact the TOC via comms on the weekend.